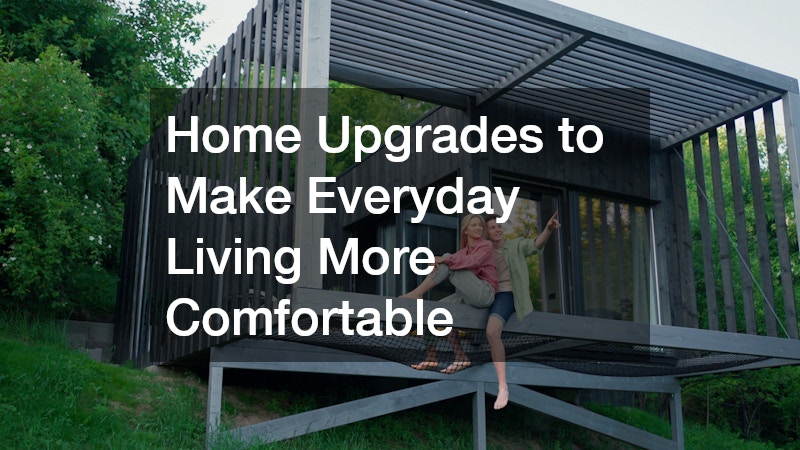
Your home’s exterior shapes everyday experiences long before someone reaches the front door. An uneven walkway makes carrying groceries harder, an exposed patio limits time outside, and poorly positioned plants can obstruct views or shade the wrong areas. When these frustrations accumulate, even a spacious property may feel less useful than it should.
Revitalizing an outdoor space works best as a series of connected decisions rather than unrelated upgrades. The most successful changes improve access, address existing problems, and create places that suit how the household actually spends time. This step-by-step approach begins with assessing the property and ends with a practical plan for keeping improvements in good condition.
Step 1: Decide How You Want to Use the Property
Before choosing materials or plants, identify what is missing from daily life outdoors. Some households want a quiet place to read, while others need room for meals, children’s activities, or gatherings. List the activities that happen frequently and note where the current space makes them inconvenient. Those patterns should shape the priorities.
Walk around the property at several times of day. Watch where sunlight falls, which areas remain damp, and how people travel between the house, parking area, and yard. A corner that looks inviting in the morning may become uncomfortable in late afternoon heat. Observations like these can prevent changes based only on appearance.
For a property with several competing needs, local landscape designers can help connect activity areas, planting beds, and circulation into a coherent layout. A design should account for existing slopes, mature vegetation, utilities, and access for maintenance. It is easier to adjust a plan on paper than to relocate finished features later.
Consider the routes that must remain clear. A narrow passage or difficult-to-open fence gate can interrupt movement between the front and back of the property, particularly when someone is carrying equipment or pushing a stroller. Identifying these bottlenecks now helps determine which alterations will have the greatest practical effect.
Step 2: Inspect Existing Structures and Safety Concerns
An appealing redesign cannot compensate for unresolved damage. Examine patios, stairs, retaining features, railings, fences, and exterior walls for visible deterioration. Look for shifting surfaces, loose components, or places where water appears to collect against the house. Document concerns so qualified professionals can assess their significance before new finishes conceal them.
Roof edges and gutters deserve attention because water from above can affect improvements below. Roofing contractors can evaluate damaged roofing materials, flashing concerns, and drainage connections when there are signs of leakage or deterioration. Addressing these issues first helps protect new planting areas, walkways, and gathering spaces from preventable runoff problems.
A safety review should also include lighting and changes in elevation. Steps that disappear into shadow, slick surfaces near a door, and poorly defined boundaries can make an otherwise attractive yard harder to navigate. Planning for secure footing and appropriate illumination will influence later decisions about materials and fixture locations.
Large trees need particular scrutiny when limbs overhang occupied areas or the trunk shows obvious signs of distress. Professional assessment can establish whether pruning, monitoring, or tree removals are appropriate. Removing a tree should not be the automatic response to every concern, but serious structural defects should not be ignored while planning new outdoor features.
Step 3: Address Water Movement and Ground Conditions
Water follows the property’s grades whether or not those grades are visible. After rainfall, observe how quickly puddles disappear, where soil washes away, and whether downspouts discharge toward walking areas. Persistent dampness may indicate a drainage or grading problem that deserves professional evaluation before paths, beds, or new surfaces are installed.
A concrete driveway that slopes toward a garage or develops recurrent pooling may need an assessment of its drainage conditions, not merely a cosmetic finish. Water movement can affect adjoining soil and paved areas. The right response depends on the cause, which may involve grades, runoff routes, or a deteriorated section of the surface.
Planting choices should work with the site’s moisture conditions rather than conceal them. Plants suited to consistently damp ground may tolerate a location that stresses drought-adapted species, but landscaping cannot replace necessary drainage corrections. Protect foundations and occupied areas by treating persistent water problems as a separate priority.
If paths or patios are being redesigned, discuss runoff management with the provider responsible for the paving service before finalizing elevations and materials. Surface pitch, transitions, and drainage features are easier to coordinate during planning. A visually smooth connection between spaces is not enough if water is directed toward a doorway.
Step 4: Develop a Planting Plan That Will Mature Well
Greenery can define outdoor rooms, soften boundaries, and make a hardscaped yard feel more welcoming. Start by deciding which locations need shade, seasonal color, privacy, or low-growing ground cover. Plants should be selected for mature dimensions, sun exposure, soil conditions, and maintenance requirements rather than simply for how they look at installation.
Local landscape designers may be especially useful when an existing yard contains established trees or several distinct growing conditions. A planting layout should preserve adequate clearance around buildings, walkways, and utilities. Grouping plants with similar watering needs can also make ongoing care more manageable without sacrificing visual variety.
Tree placement deserves patience because its effects extend far into the future. A tree planting service can help select an appropriate species and location while considering root space, overhead clearance, and growth habits. A sapling placed too close to a roofline or paved edge may create complications as its canopy and root system expand.
Layer heights and textures so the garden offers interest from multiple viewpoints. Low plants along paths can keep sightlines open, while shrubs may define seating areas without enclosing them completely. Leave room for access to irrigation components, utility equipment, and exterior walls; an attractive arrangement should not obstruct routine property care.
Step 5: Rework Paths, Patios, and Gathering Areas
Walking routes should connect destinations naturally. If people repeatedly cut across the lawn to reach a seating area, the planned path may be taking an unnecessarily indirect route. Consider width, changes in level, and slip resistance as well as appearance. Materials should be appropriate for the climate and expected traffic.
When comparing paving businesses, ask how they evaluate the base beneath new surfaces, handle transitions, and plan for water runoff. A durable result depends on preparation and site conditions, not just the visible paver or slab. Written descriptions of the proposed scope can help you compare approaches without assuming all projects are identical.
A patio should have enough usable space for its intended furniture and movement around it. Measure how chairs pull back from a table and whether the main route to the yard remains open during gatherings. If the patio is next to the kitchen, a convenient connection may do more for everyday use than added square footage in an isolated corner.
The timing of a paving service matters when nearby irrigation, lighting, or planting beds are also changing. Below-ground work and grading decisions generally need coordination before the finished surface goes in. This helps avoid disturbing completed paving to accommodate a feature that could have been planned earlier.
Step 6: Make the Arrival Area More Functional
The driveway and front approach set expectations for the rest of the property, but their function matters more than first impressions. Observe whether vehicles have enough space to turn, pedestrians can reach the entrance comfortably, and rainwater travels away from the house. Repeated obstacles may suggest a layout issue rather than a need for decorative upgrades.
If a concrete driveway has extensive cracking, settlement, or uneven sections, a professional inspection can help determine whether localized work or a larger replacement is appropriate. Surface conditions alone do not reveal every cause. The base, drainage, and movement of surrounding ground may affect which solution will last.
Think about the relationship between parking, bins, deliveries, and the front door. Visitors should not have to cross an active vehicle path unnecessarily, and planting should not obscure the view of someone backing out. Clear borders and well-positioned lighting can help the arrival area feel orderly without making it overly formal.
Paving businesses may offer different materials and construction approaches depending on the property. Compare proposed preparation methods, drainage details, and how the new surface will meet existing walks or garage thresholds. These practical choices influence long-term performance more directly than selecting a color from a sample alone.
Step 7: Restore Recreation Features Before Decorating Around Them
A pool, water feature, or recreation area should be evaluated for function before its surroundings receive an expensive visual refresh. Note leaks, inconsistent equipment operation, damaged edges, and any areas that feel unsafe underfoot. A coordinated improvement plan distinguishes the condition of the feature itself from the condition of the surrounding landscape.
For a pool with recurring operational problems, local pool repairs can address faults identified through professional inspection. The specific work depends on the pool’s construction and equipment, so avoid assuming that a visible symptom points to a single cause. Resolving functional issues first protects adjacent finishes from disruption during later service.
Consider how people enter, exit, and move around the recreation area. Clear routes, appropriate lighting, slip-resistant surfaces, and visible boundaries support comfortable use. Furniture should not block necessary access to pool equipment or create narrow passages near water. Accessibility to maintenance areas belongs in the design from the beginning.
Where insects, debris, or nearby vegetation interfere with enjoyment, screen enclosures may be worth evaluating for suitable pool or patio settings. Their feasibility depends on the site, applicable building requirements, and the structure’s design. The enclosure should complement access routes and maintenance needs rather than simply surround an area without considering how it is used.
Step 8: Create Comfortable Spaces for Different Weather
Outdoor comfort changes by hour and season. A seating area that receives pleasant morning light might become too hot for lunch, while an open terrace may be unusable during frequent rain. Place activity zones according to their likely use, then consider shade, shelter, airflow, and the orientation of the home.
A tree planting service can contribute to a long-term shade strategy, though a young tree will not provide a mature canopy immediately. Pairing future tree cover with an appropriately designed shade feature may better serve the space in the meantime. Choose locations that preserve useful daylight inside the home and avoid foreseeable conflicts with structures.
Comfort also comes from thoughtful scale. A bench tucked beside a garden bed creates a different experience from a dining area that needs room for several people. Leave comfortable circulation around furnishings, and position seating to take advantage of views while reducing exposure to prevailing wind or intense afternoon sun.
For a covered entertaining area, screen enclosures can help create a more sheltered setting from insects while preserving ventilation and outdoor views. They do not eliminate heat, severe weather risks, or all maintenance needs. Evaluate how doors operate, how the enclosure connects to other structures, and whether the layout still allows easy movement through the yard.
Step 9: Strengthen Privacy and Everyday Access
Boundaries shape how private and secure a yard feels, but a continuous solid barrier is not always the best solution. Consider where privacy is most needed, such as near dining furniture or a bedroom window, and where openness is preferable. Plants, fencing, and the placement of gathering areas can work together to create different levels of enclosure.
A fence gate should be easy to operate and sized for the people and equipment that regularly pass through it. Check whether its swing conflicts with steps, paths, or stored items. Hardware, hinges, and posts need to suit the gate’s weight and exposure, particularly in locations subject to frequent use or strong winds.
Think beyond the property line when establishing screening. A dense hedge may eventually reach into a walkway, while a tall planting could block a useful sightline. Plan for mature size and maintenance access, and confirm boundaries before installing permanent features. The aim is lasting separation without creating a new obstacle.
Tree removals may become necessary if an established tree has been professionally assessed as unsafe or conflicts with an approved redesign in ways that cannot reasonably be managed. Such decisions should account for replacement planting, shade loss, and the impact on neighboring areas. A cleared space needs a purpose, not just an absence of vegetation.
Step 10: Sequence the Work and Plan for Upkeep
Exterior projects often involve connected trades, and their order can determine whether finished work must be disturbed. Start with inspections and necessary structural or drainage corrections, then coordinate grading, utilities, and surface installation. Planting and furnishings generally come later, once heavy equipment and major access needs are addressed.
Where roof drainage or exterior structural work is part of the plan, schedule roofing contractors at a stage that allows their work to be completed without damaging new patios or garden beds. Provide all contractors with the same basic layout and intended sequence. Clear coordination reduces conflicting assumptions about access, elevations, and finished surfaces.
Create a maintenance outline for the elements being installed. Plants need appropriate watering and pruning, paved areas benefit from periodic inspection, and drainage routes must remain clear. Record material information, relevant care instructions, and the locations of buried components. This information makes future service decisions easier, especially if ownership or contractors change.
For properties with pools, retaining a record of previous local pool repairs can help technicians understand recurring symptoms and equipment history. Keep service documentation alongside other exterior maintenance records. Planning for access and regular evaluation is part of protecting the improvement, not an additional decorative feature.
Revitalizing an exterior space begins with understanding how the property is used and resolving problems that would undermine future improvements. Once drainage, safety, and structural conditions are addressed, paths, planting, recreation features, and comfortable gathering places can work together as one cohesive environment.
The strongest results come from choices that remain practical beyond the first season. Prioritize clear movement, appropriate materials, healthy vegetation, and maintenance access. With those essentials in place, the outside of your home can become a more inviting, dependable extension of daily life.